📉 Advanced Image Compressor
Reduce image file size and convert between formats with quality control
Original Image
Compressed Image
1. Image Compressor
In the fast-paced digital world, website speed can make or break user experience. Large, uncompressed images are one of the biggest reasons pages load slowly, especially on mobile devices. An image compressor Online is the solution—it reduces image file size while maintaining visual clarity, helping you deliver a faster, smoother browsing experience.
Table of Contents
2. What Is an Image Compressor Online Tool?
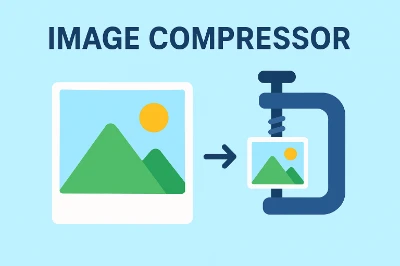
An image compressor Online is a tool or software that compresses images for web by removing unnecessary data such as redundant pixels or embedded metadata. Depending on your needs, you can choose between:
- Lossy compression – Slightly reduces quality to achieve a much smaller file size, perfect for photographs.
- Lossless compression – Preserves exact quality while still reducing file size, best for graphics or images with transparency.
By understanding the difference between lossy vs lossless compression, you can pick the best method to compress images without losing quality.

3. Why Image Compressor Matters
Experience & Expertise (E & E):
Uncompressed images significantly impact website performance, especially on mobile devices. Large file sizes increase page load times, which can lead to higher bounce rates and lower engagement. Optimizing images ensures a smoother user experience across all devices.
Authoritativeness & Trustworthiness (A & T):
Image compression follows best practices recommended by industry leaders, including Google Web Fundamentals and Google PageSpeed Insights. Adhering to these guidelines helps maintain high search rankings while ensuring your site remains fast, reliable, and user-friendly.
4. Types of Image Compression:
- Lossless Compression: Preserves exact image quality (ideal for PNGs, graphics).
- Lossy Compression: Removes some image data for smaller size (great for photos, JPEGs).
Pro tip: For photographs, lossy compression (at a moderate quality setting) often hits the best balance between clarity and size.
5. Choosing the Right Image Compressor
Look for:
- Transparency in algorithms & quality: Can you preview or choose settings?
- Support for key formats: JPEG, PNG, WebP, SVG.
- Batch processing support: Especially helpful for large galleries.
- Security & privacy: Particularly when using online compressors—check their privacy statements.
Trusted external references:
- Google’s Web Fundamentals on Image Optimization
- Mozilla Developer Network (MDN) article on Responsive Images

6. Step-by-Step Guide:
How to Compress Images Effectively
- Choose the Right File Format
- Select a Reliable Image Compressor Tool
Whether you prefer an online image compressor or offline software, ensure it supports multiple formats and offers adjustable settings. - Preview Before Saving
Always compare the original and compressed versions to avoid over-compression that could harm visual quality. - Automate the Process
For WordPress, use plugins like ShortPixel or Smush to automatically reduce image file size on upload. Developers can integrate build tools like gulp-imagemin for bulk optimization. - Test Your Website’s Performance
Use free tools such as Google PageSpeed Insights or GTmetrix to measure improvements after compression.
7. Online vs Offline Image Compressors
- Online Tools: Quick, no installation required, accessible from any device. Examples include TinyPNG and Squoosh.
- Offline Software: Offers more control, works without internet, suitable for bulk processing. Examples include ImageOptim or Photoshop’s “Save for Web” feature.
Both options can fit into your image optimization workflow, depending on whether convenience or control is your priority.

8. SEO Tips for Image Compression
- Always use descriptive file names and alt text.
- Combine best practices for compressing images with responsive image techniques.
- Consider lazy loading to further improve page performance.
- Regularly audit your media library for outdated, oversized files.
9. Blog Guides:
To strengthen your site’s structure and relevance, consider linking (naturally and contextually) to related posts such as:
- “Optimizing Web Performance: A Guide to Faster Loading Pages”
- “How to Choose the Best Image Format for Your Website”
- “How to Implement Lazy Loading for Images”
- “A Complete Guide to Web Performance Optimization”

10. Benefits of Using an Image Compressor
- Boosts Page Speed – Reducing image load time leads to faster browsing, especially important for mobile users.
- Improves SEO Rankings – Search engines prioritize websites that load quickly and meet web performance optimization standards.
- Saves Storage & Bandwidth – Smaller files require less server space and reduce bandwidth usage.
- Enhances User Experience – Visitors enjoy quick access to content without delays.
11. Final Thoughts
Using an image compressor is no longer optional—it’s a critical part of modern website optimization. By combining smart file format choices, the right compression method, and regular performance testing, you can compress images without losing quality, improve your SEO, and deliver a seamless user experience.
12. Summary Table: “At a Glance”
| Step | What to Do | Why It Matters |
|---|---|---|
| 1. Choose right format | JPEG/WebP for photos, PNG for graphics | Minimizes unnecessary data |
| 2. Use a trusted tool | E.g. ImageOptim, TinyPNG, Squoosh | Ensures quality and privacy |
| 3. Preview before finalizing | Avoid over-compression | Maintains visual fidelity |
| 4. Automate in workflow | Use WordPress plugin or dev pipeline | Saves time, enforces consistency |
| 5. Measure performance | Use PageSpeed/Lighthouse | Quantifies SEO & UX improvements |
13. Frequently Asked Questions (FAQs):
1. What is the best way to compress images without losing quality?
The best way is to use lossless compression methods, which reduce file size by removing unnecessary data without changing the visual quality. Tools like TinyPNG, ImageOptim, and Squoosh offer excellent lossless options.
2. Which is better: lossy or lossless image compression?
It depends on your needs. Lossy compression achieves smaller file sizes but slightly reduces quality, making it ideal for photos on the web. Lossless compression preserves quality perfectly but may not reduce the size as much—better for graphics and transparent PNGs.
3. Does image compression improve SEO?
Yes. Compressing images reduces image load time, which improves page speed—a key factor in Google’s ranking algorithm. It also helps meet Core Web Vitals requirements, boosting your site’s SEO performance.
4. What is the best format for compressed images?
For most web use cases:
JPEG or WebP for photos.
PNG for images with transparency.
SVG for icons and simple graphics.
WebP is becoming the preferred choice because it offers smaller sizes with good quality.
5. Can I compress images in bulk?
Yes. Many tools and plugins allow bulk image compression—for example, ShortPixel and Smush for WordPress, or desktop apps like ImageOptim for Mac and FileOptimizer for Windows.
6. Is it safe to use an online image compressor?
Reputable online compressors are safe, but always check their privacy policy to ensure your uploaded images aren’t stored or shared. For sensitive files, offline tools are a safer choice.
7. How small should I make my images for the web?
Aim for images under 200 KB whenever possible, without compromising visible quality. For large, full-width images, staying under 500 KB is still good practice.